GDPR Compliant Transcription with AI

TLDR;
Well that's silly not to read this article, since this is a how-to on setting up a GDPR compliant method of transcribing audio with the help of AI. 🙃
Links to references at the end of the article. 👇
Intro
When we want to process transcriptions in a GDPR compliant way, there are two great options for Mac users, both leveraging Whisper AI from Open AI famous for its ChatGPT.
"Whisper is an automatic speech recognition (ASR) system trained on 680,000 hours of multilingual and multitask supervised data collected from the web. We show that the use of such a large and diverse dataset leads to improved robustness to accents, background noise and technical language. Moreover, it enables transcription in multiple languages, as well as translation from those languages into English. We are open-sourcing models and inference code to serve as a foundation for building useful applications and for further research on robust speech processing."
How is this GDPR compliant you might ask, you will process and transcribe locally on your machine, meaning none of the data is sent anywhere. However, it requires us to download the entire model onto our computers.
The first option is using MacWhisper. The free tier plan is pretty accurate, minimal setup and can record right within the app. Check the system requirements before installing.
The second option can be a bit more intimidating and contains a few more steps, but gets more accurate output. The reason for this is MacWhisper only provides the small model with the free tier, but using the second method gets us the large model for free. Let's focus on the second option.
If you stick with me to the end, I will show you how to make things easier with shortcuts that we can live with. Also note, that for both options the translate feature requires data to be sent, then you have to check if that is compliant with your privacy requirements. As an alternative, you can just run the transcription multiple times to different target languages.
Become a hacker 🥷
Just kidding, but you will feel like one after we get through these steps. First let's open up the Terminal application.
Setup
Xcode. We need to first make sure Xcode is setup, Apple's developer tools, which may already be installed. Enter the following into the terminal command line.
Homebrew. This is a package manager for various libraries.
You may find that you need to add Homebrew to your PATH, refer to the documentation here.
Whisper. Make a folder where you want to install Whisper, and navigate to it . For example, a folder named "Tools".
Then using Git, clone the repository code. Installing Xcode will provide you the Git package.
Navigate into the whisper repository directory.
Download the model
Build the model from the downloaded assets
ffmpeg. If the tool you use, such as QuickTime to record saves files as .m4a or similar, we need to be able to convert to .wav in order for Whisper to understand it.
Now you have everything you need to get started.
Let's do it!
Convert audio to .wav
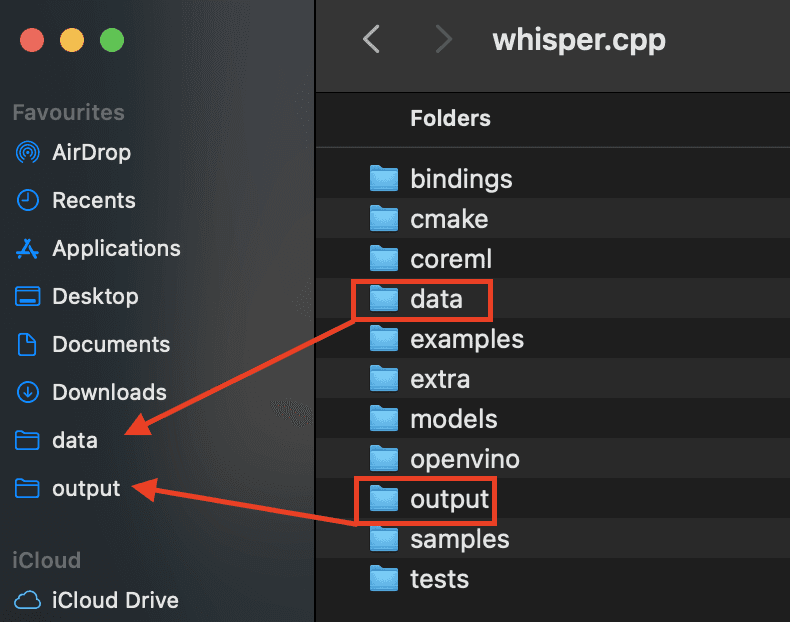
We are going to first create a folder named "data" inside the whisper.cpp directory.
You can do this with the Finder or using the terminal with the following command:
*It will be useful to make a shortcut to this folder in Finder.
To convert all audio files to .wav, make sure you are in the /whisper.cpp directory in the terminal and run:
At this point you should see a new folder called "output". In that folder you will see the .wav version of your original audio file. I recommend adding this as a shortcut in Finder as well.
This is a large piece of code to either remember or to keep somewhere to copy and paste in. At the end of this article I will show you a way to make a shortcut for this. Also note that the command converts ALL audio files in the data folder, so you want to move or delete converted files.
Transcribe
We need to create a .vtt file. So back in the terminal and making sure we are in the /whisper.cpp directory:
This will give a Norwegian output, however if you want it in English, just change no to en.
And now you should see both .wav and .vtt files in the /output folder.
This is also a hard-to-remember and clunky to copy-paste piece of code so we will also create a shortcut for this at the end. Note that similar to the convert command, this will transcribe ALL .wav files in output, so you want to move or delete audio files that already have transcriptions.
Uploading to a UI for navigation
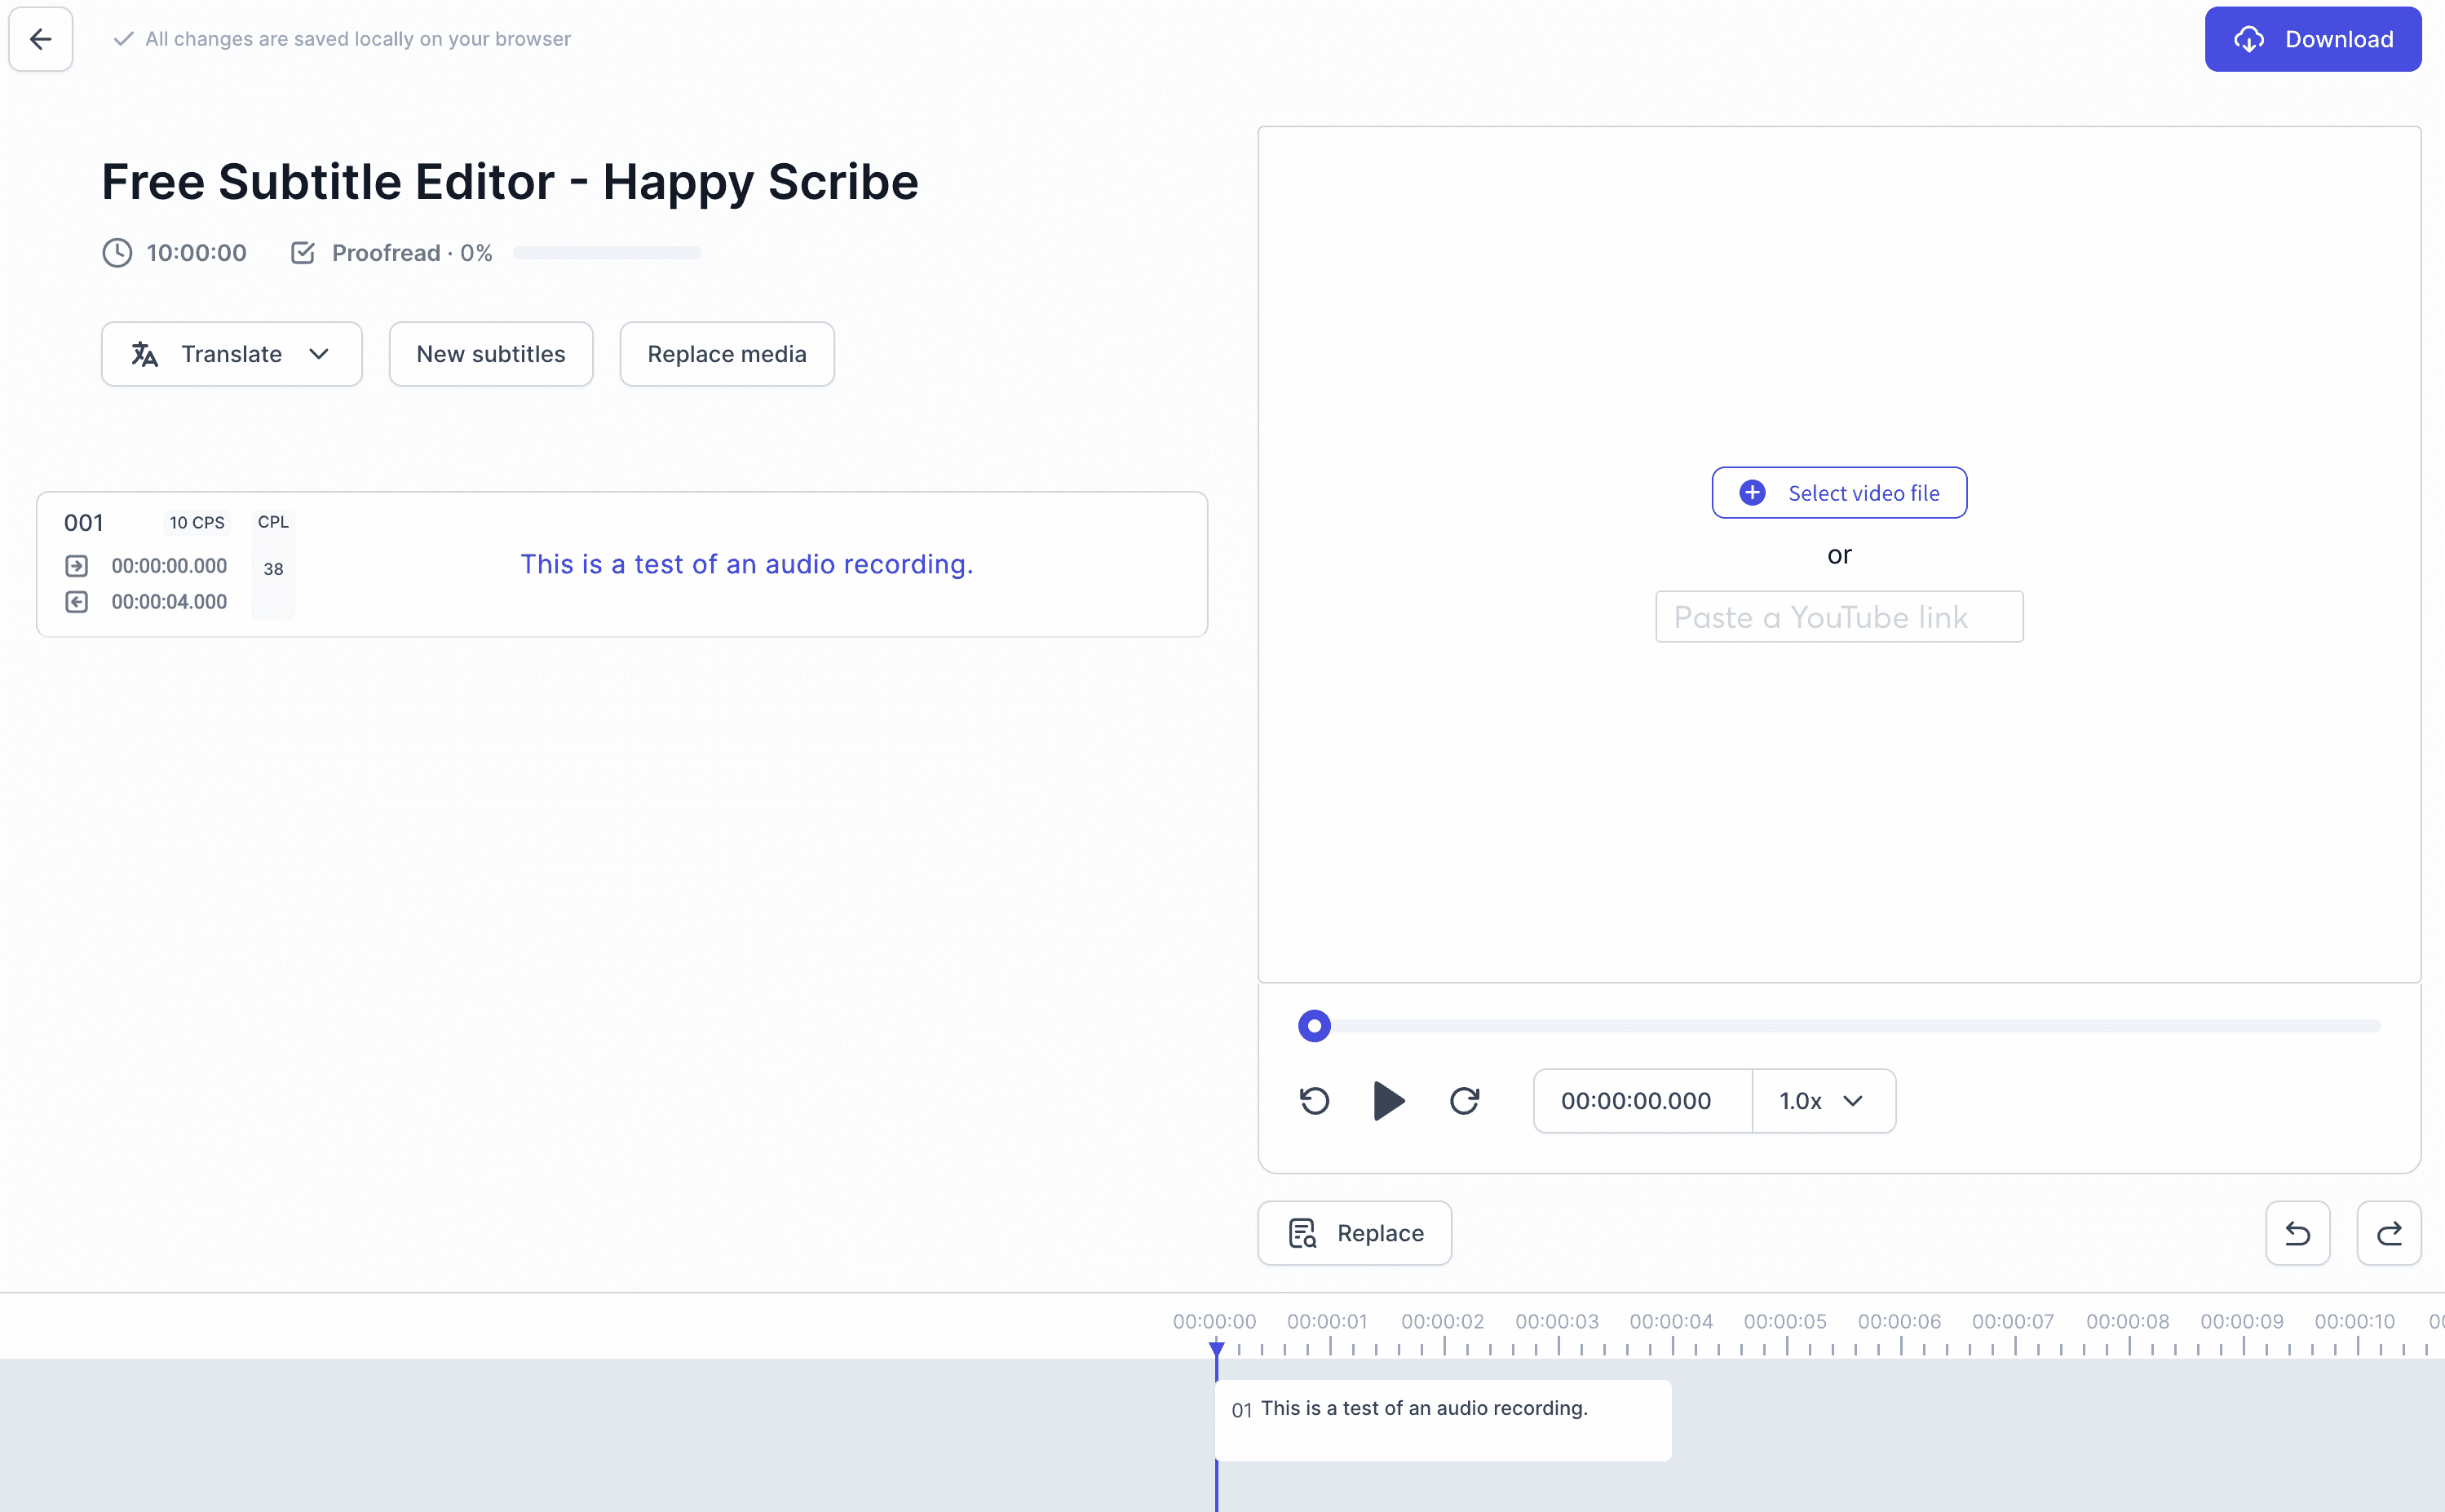
Now that we have an audio file and accompanying subtitles (vtt) file, we want to upload, but not really upload, to a graphical user interface to navigate, search and edit the files. HappyScribe has a great, free visual editor here. Best of all, the data only gets sent to your browser and nowhere else. Nerds, feel free to open the network tab of the browser and watch the traffic (hint: there isn't any except between your Mac and browser).
Upload the text
Click on New subtitles and upload the .vtt
Upload the audio
Then click on Select audio file and upload the .wav file.
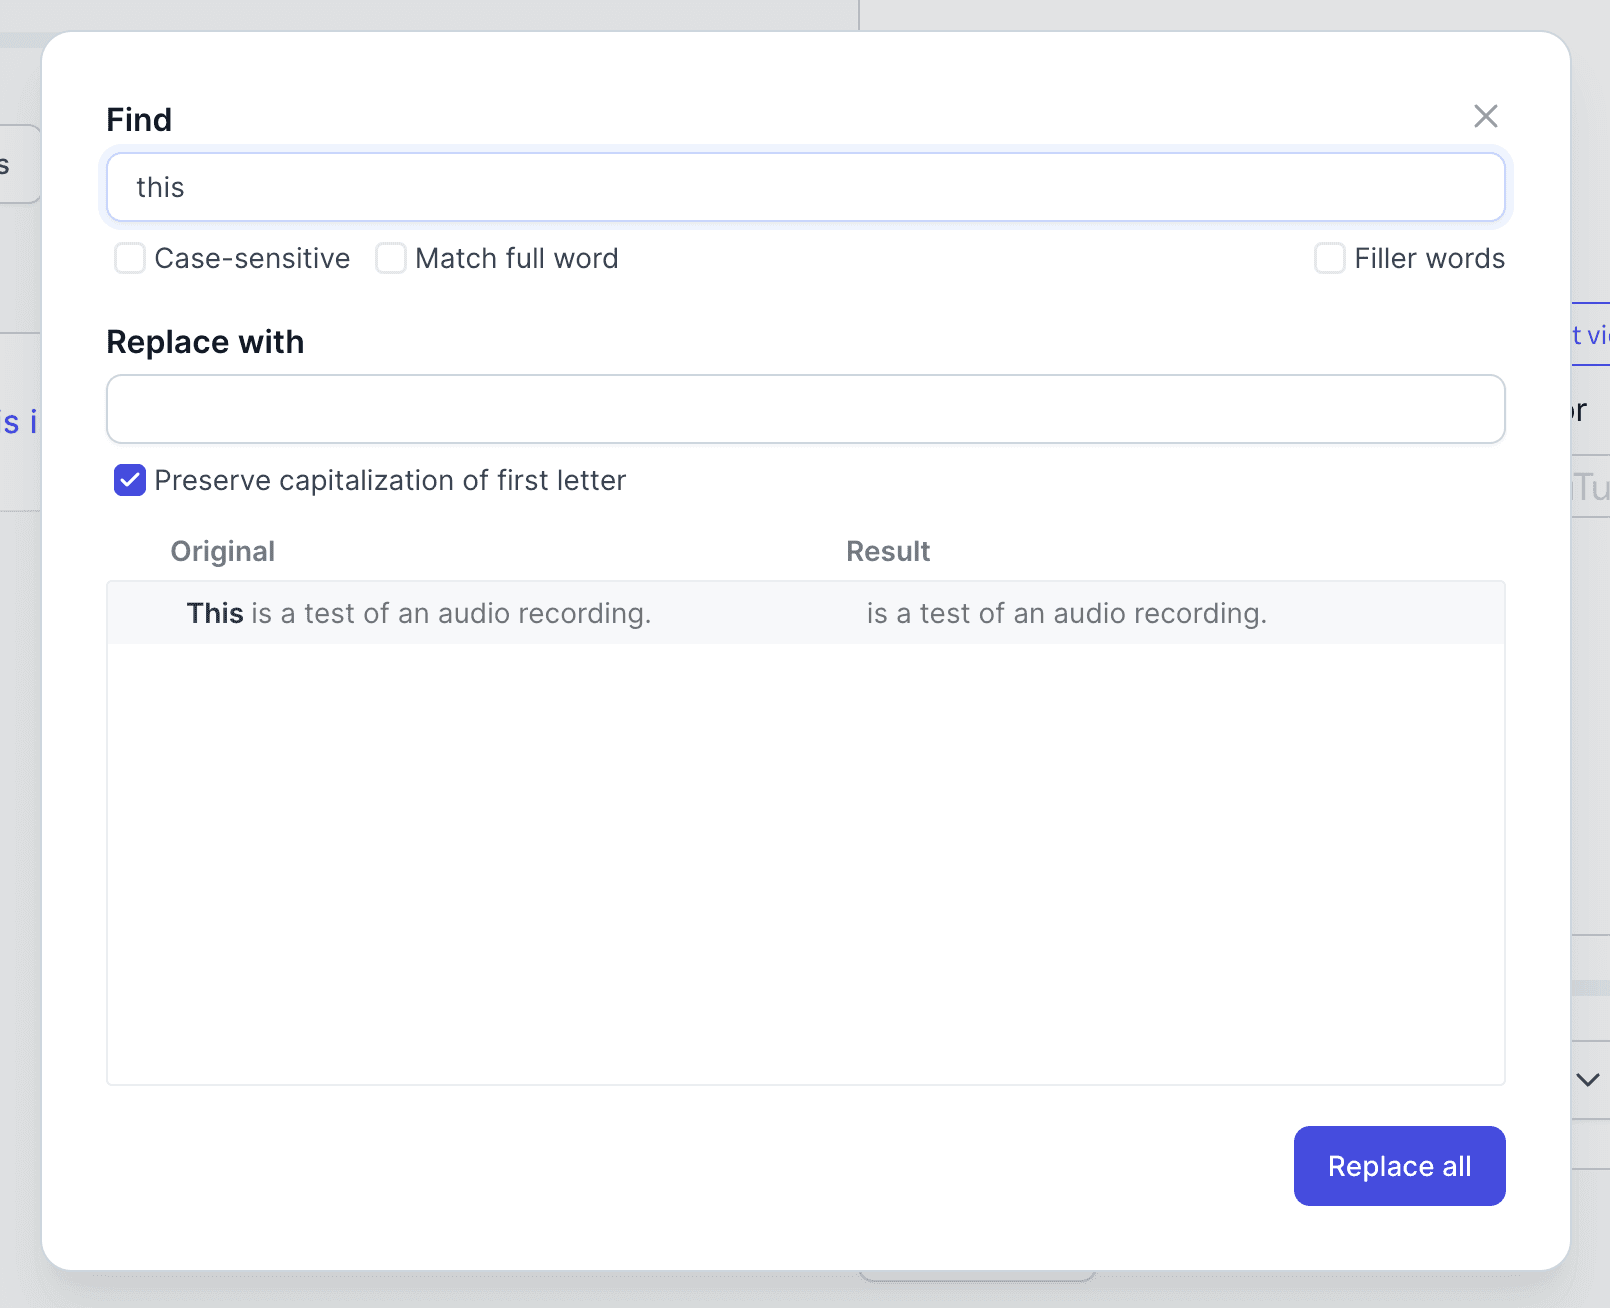
Use CMD + f to do some cool stuff 🤯
Let's make life easier 🧘♀️
We don't want to copy and paste those lines of code each time we want to transcribe do we?! Nope. So we can actually create our own shortcuts (functions) to use in the command line.
To setup a function, we open up the configuration file called .zshrc. If you have VS Code installed, then use the codecommand, otherwise use nano.
For many, this will be an empty screen. Otherwise if you have made aliases for other commands, you might see them here as well.
Copy and paste the following into the terminal.
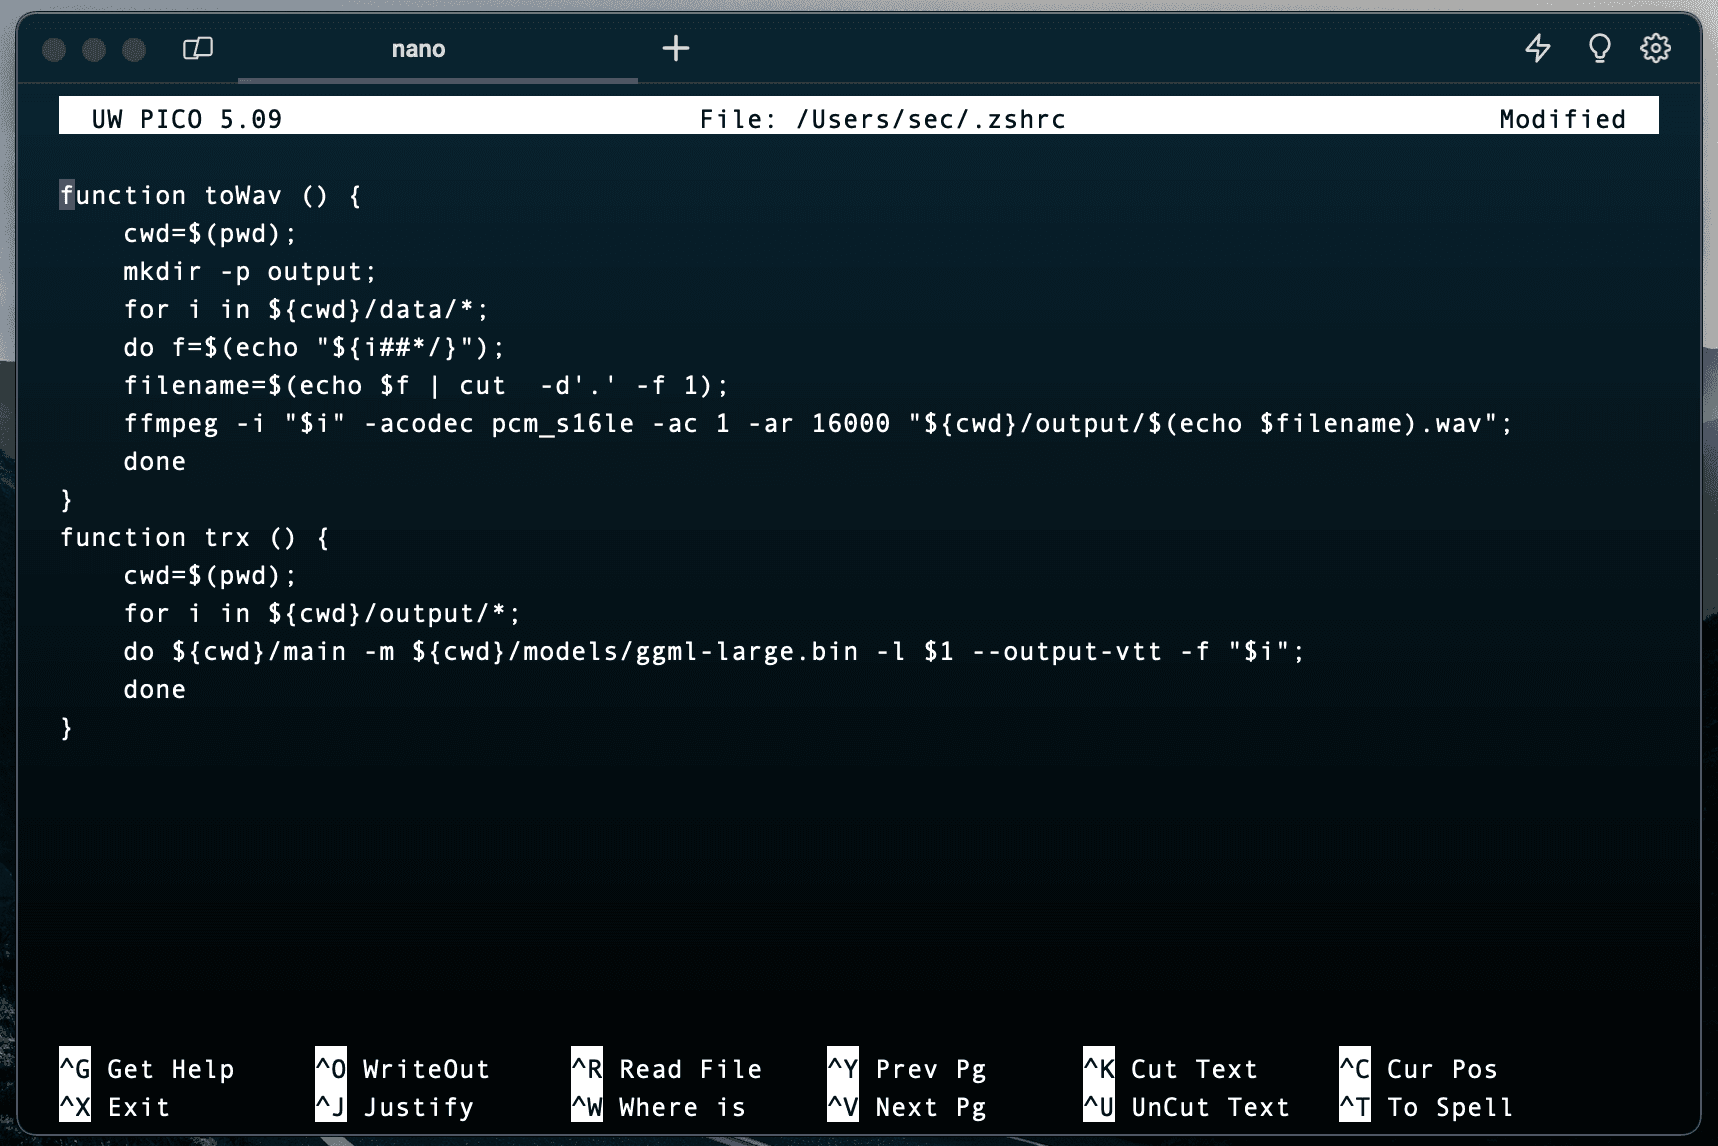
Next save your changes, if you are in nanothen it is control + x then y.
Now we need to update the terminal.
To test it out:
Navigate the terminal to the whisper.cpp directory, something like this:
Make sure you have an audio file in whisper.cpp/data.
To convert to .wav format: toWav is all you need to enter in the terminal.
To see if it worked, you can check the /output folder for the converted audio.
Next, to transcribe trx <lang> and you will get the transcription in the target language in the same output directory, where <lang> can be en for English or no for Norwegian. So for example if I wanted to transcribe the audio to English, it would look like this: trx en.
Here's everything in a nutshell from beginning to end:
Record audio, place it in
Tools/whisper.cpp/data.Open the terminal and navigate to the whisper folder.
Convert the audio file if it is not already a .wav file.
Transcribe the file.
How do I update the model?
To keep the model updated, just repeat the steps previously used to install and make the model.
And voilà, you are ready to transcribe audio in a GDPR compliant method using AI for more effective transcriptions. There is a lot more you can do with Whisper AI so have a look at the documentation.
Thanks for reading! ✌️
References
Big thanks to my main source of information: Ida Aalen

